Converting a website into an Android app means wrapping your pages in a native shell that renders them in a WebView — Android's built-in browser engine, without the browser around it. Your HTML, CSS and JavaScript run exactly as they do on the web. What changes is everything around them: a launcher icon, a splash screen, a package name, a version number, and a signature that makes the whole thing installable.
This guide covers the whole path, in the order you will actually hit it.
What you need before you start
Less than people expect. There are two viable routes, and neither needs you to write Kotlin:
- A build service (this site's included). You supply the files and the settings; it produces a signed APK. No SDK, no Gradle, no 8 GB download.
- Android Studio. Full control, and worth it if you plan to add native features later. It is a substantial install and a real learning curve — covered separately in converting without Android Studio.
Either way you need the same four things ready: your web content, a square logo, a package name, and a decision about whether the app bundles your site or loads it live.
Step 1 — Get your web content in order
Two shapes work. A single HTML file is the simplest case: everything inline, one file, done. A ZIP of your site is the usual case — an index.html at the root plus your CSS, JavaScript, images and fonts alongside it.
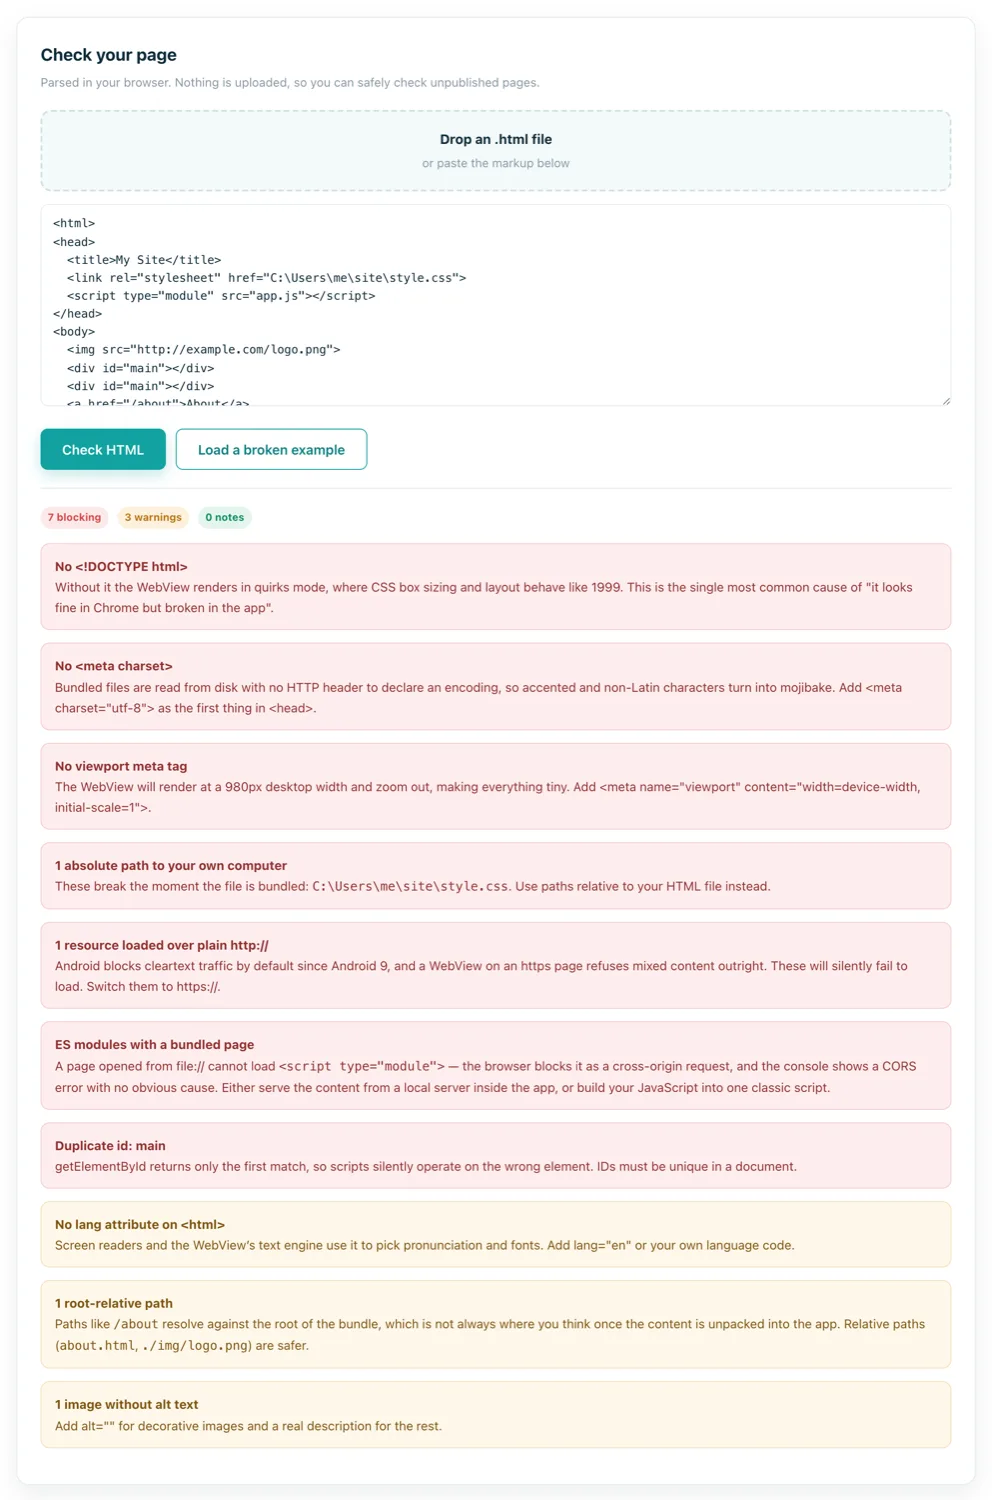
Three rules decide whether it will work once bundled:
- Relative paths only.
style.cssand./img/logo.pngsurvive the move into an app./css/style.cssandC:\Users\me\site\style.cssdo not. - Everything included. A font or script loaded from a CDN is a blank space when the phone is offline. Download them into your project.
- No ES modules if you are bundling.
<script type="module">is blocked onfile://pages. This is the single most common cause of an app that opens to a white screen.
The last one catches nearly everyone, so it is worth checking before you spend a build on it.
Step 2 — Decide: bundled or online
This choice shapes everything else about the app.
| Bundled offline | Loads a live URL | |
|---|---|---|
| Works without a connection | Yes | No |
| First screen appears | Instantly | After the network responds |
| Updating content | Needs a new app release | Change the site, done |
| App size | Runtime + your files | Runtime only, ~4–5 MB |
| Good for | Brochures, tools, catalogues, games | Shops, dashboards, anything that changes daily |
If your content changes more often than you want to ship releases, load the URL. If it must work on a plane, bundle it. Many apps sensibly do both: bundle the shell and fetch the data.
Step 3 — Make the icon
Android does not want one icon. It wants five launcher sizes, a round variant, an adaptive foreground, and a 512×512 for the Play Store listing — each in a specific folder. Generating them from one square image takes seconds and avoids the blurry-icon problem that comes from letting the system upscale a small PNG.
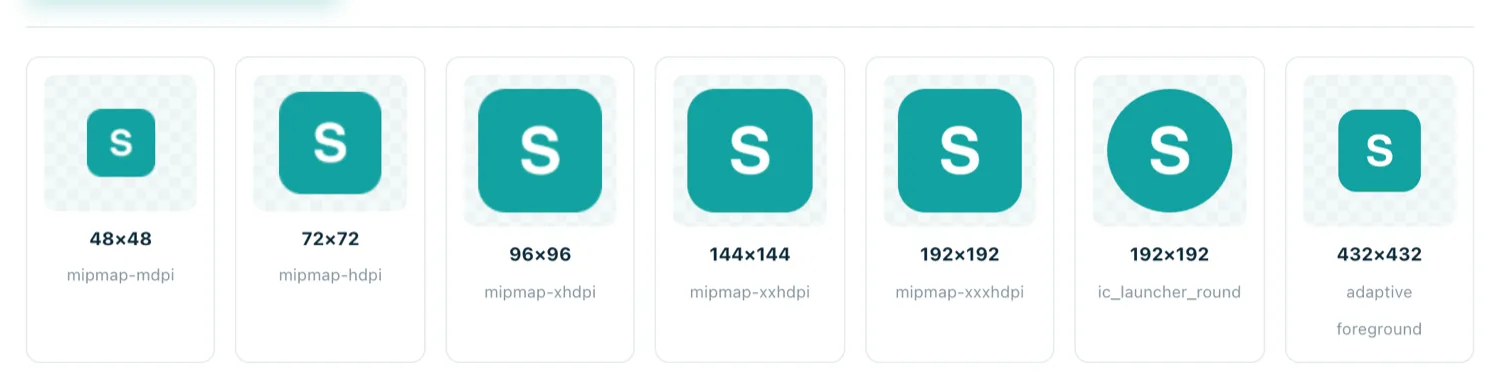
Design it for the small end. At 48 pixels a detailed logo becomes a smudge — one shape, strong contrast, no text. Full detail in the app icon guide.
Step 4 — Choose a package name you cannot change later
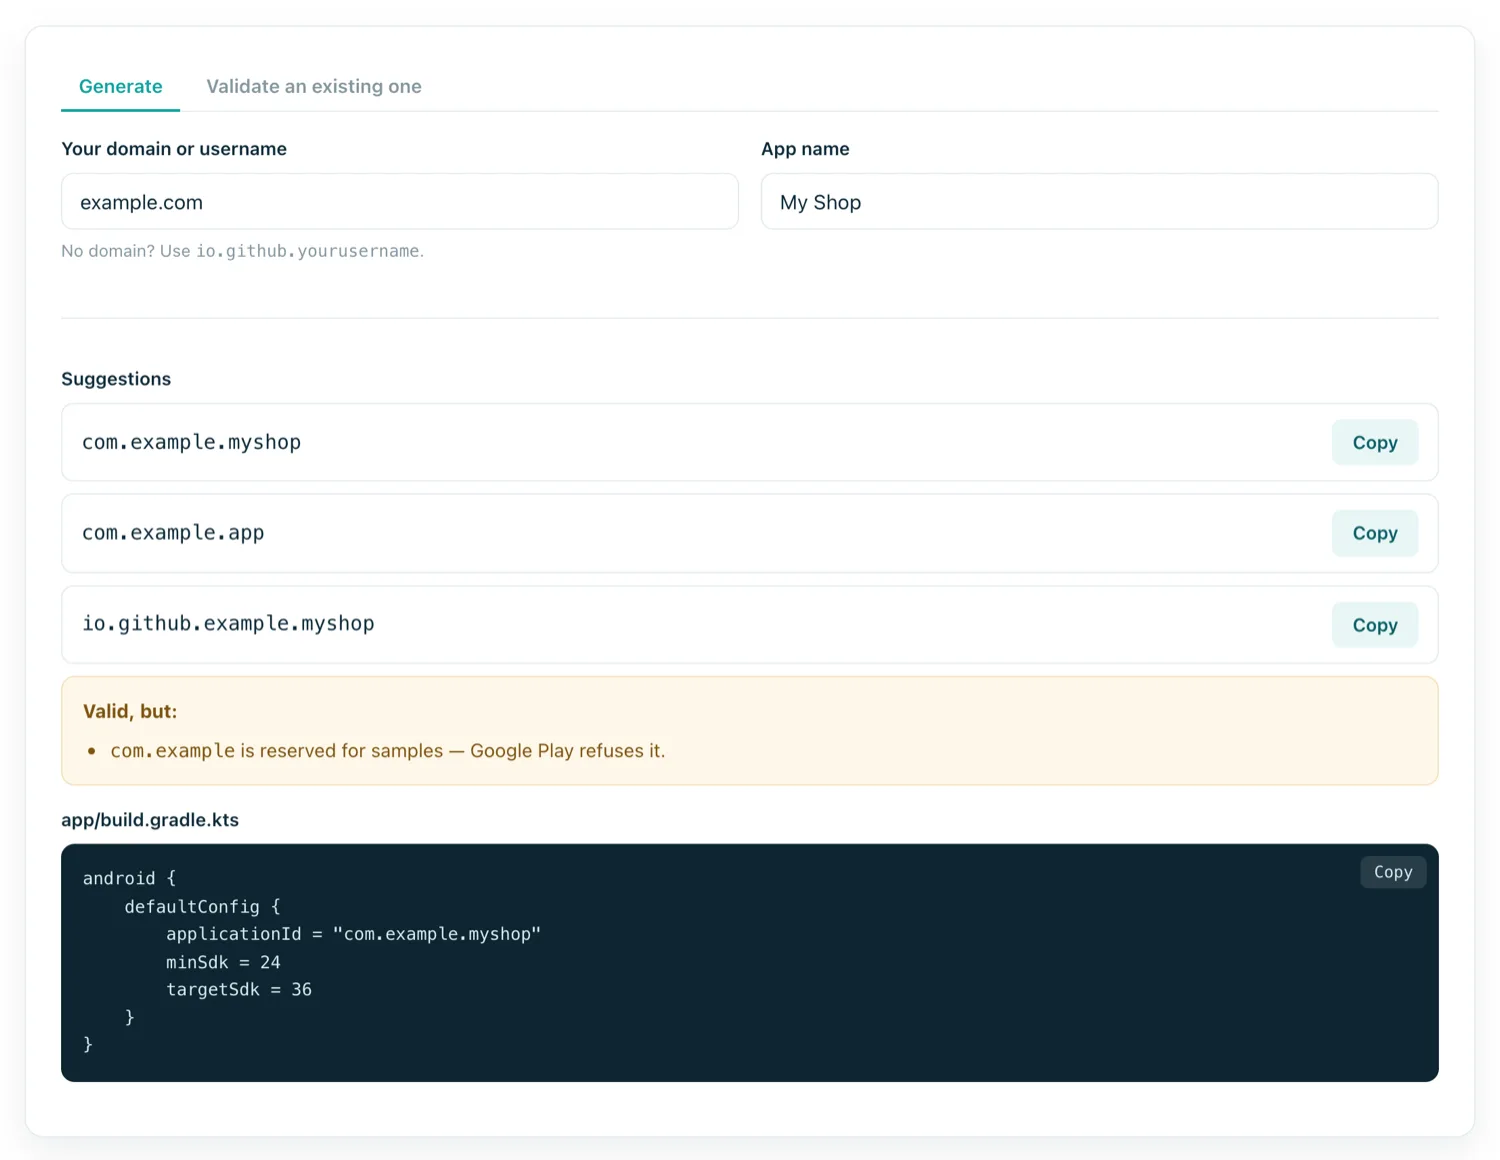
The package name (applicationId) is your app's permanent identity: com.yourdomain.yourapp. It is how Play identifies the listing and how Android decides whether an install is an update. Once published, it is fixed forever — changing it means a brand new listing with zero installs and zero reviews.
Rules that bite: lowercase only, at least two dot-separated segments, no segment starting with a digit, no hyphens, no Java keywords, and never com.example — Play rejects that outright.
Step 5 — Set the version
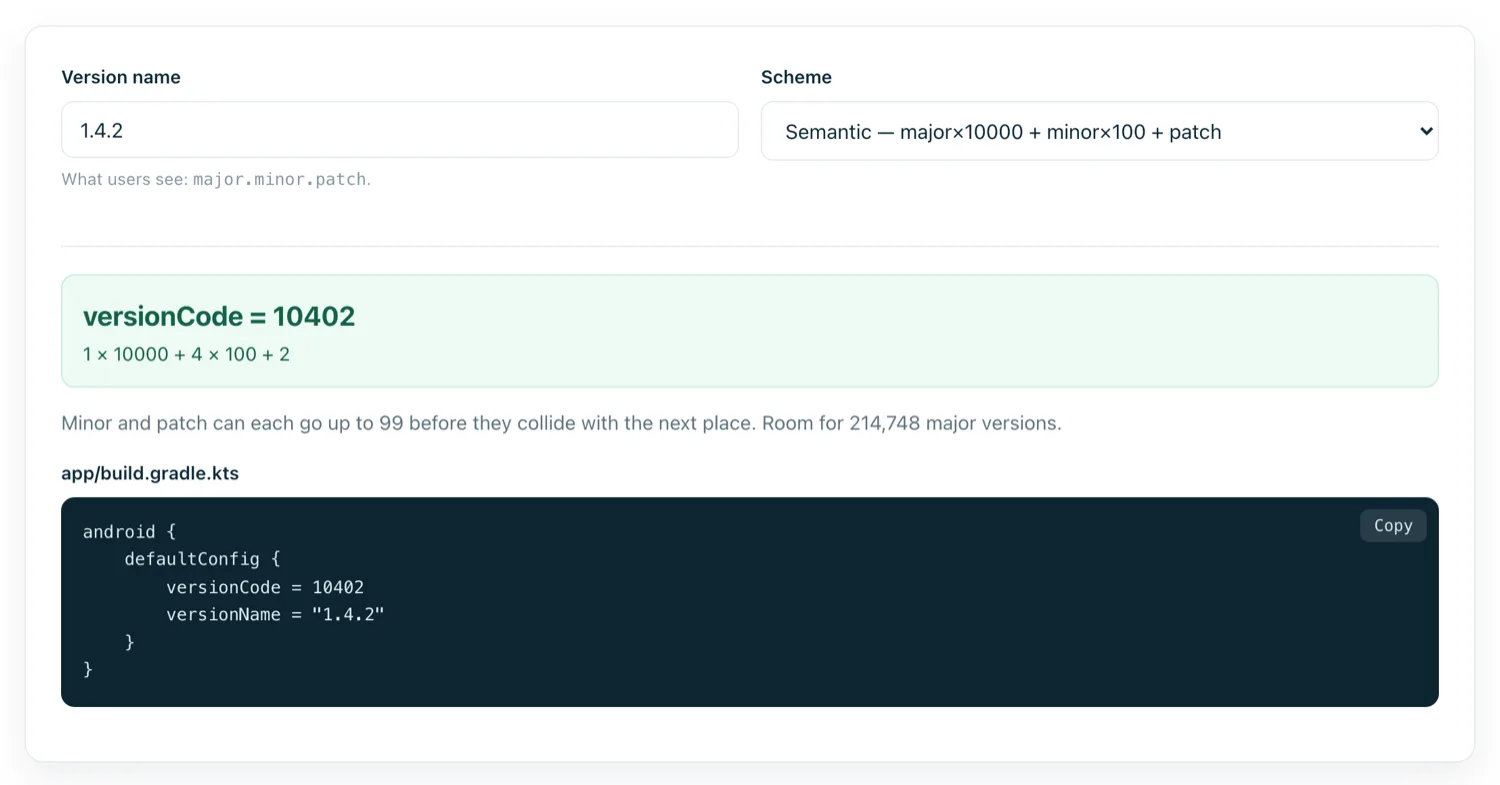
Two fields, two jobs. versionName is the string people see ("1.0"). versionCode is an integer Android compares to decide what is newer — and Play refuses any upload whose code is not higher than your previous one. For a first release, 1 and "1.0" are correct.
Step 6 — Build it
With a build service, this is where you hand over the settings and wait: the service assembles an Android project around your content, compiles it, signs it, and hands back an APK. A few minutes, typically.
Two things are worth knowing about what comes back. First, the app is signed — Android refuses to install an unsigned APK, so every build gets a key. Second, if you ever plan to publish to Play, the key that signs your first release must sign every release after it. Losing it means you cannot update your own app.
Step 7 — Install and test on a real device
Copy the APK to an Android phone and open it. The system will ask permission to install apps from this source — that is expected for anything not from the Play Store, and the toggle is per-app in Settings.
Then test the things emulators and browsers hide:
- The back button. Does it navigate your history, or close the app from the first tap?
- Rotation. Does the layout survive landscape?
- Offline. Turn on airplane mode. A bundled app should be unaffected; a live one should say something useful, not show a browser error page.
- Forms and uploads. File inputs need explicit handling in a WebView and silently do nothing without it.
- External links. A link to another site should open the browser, not strand the user inside your chrome-less app.
How big will it be?
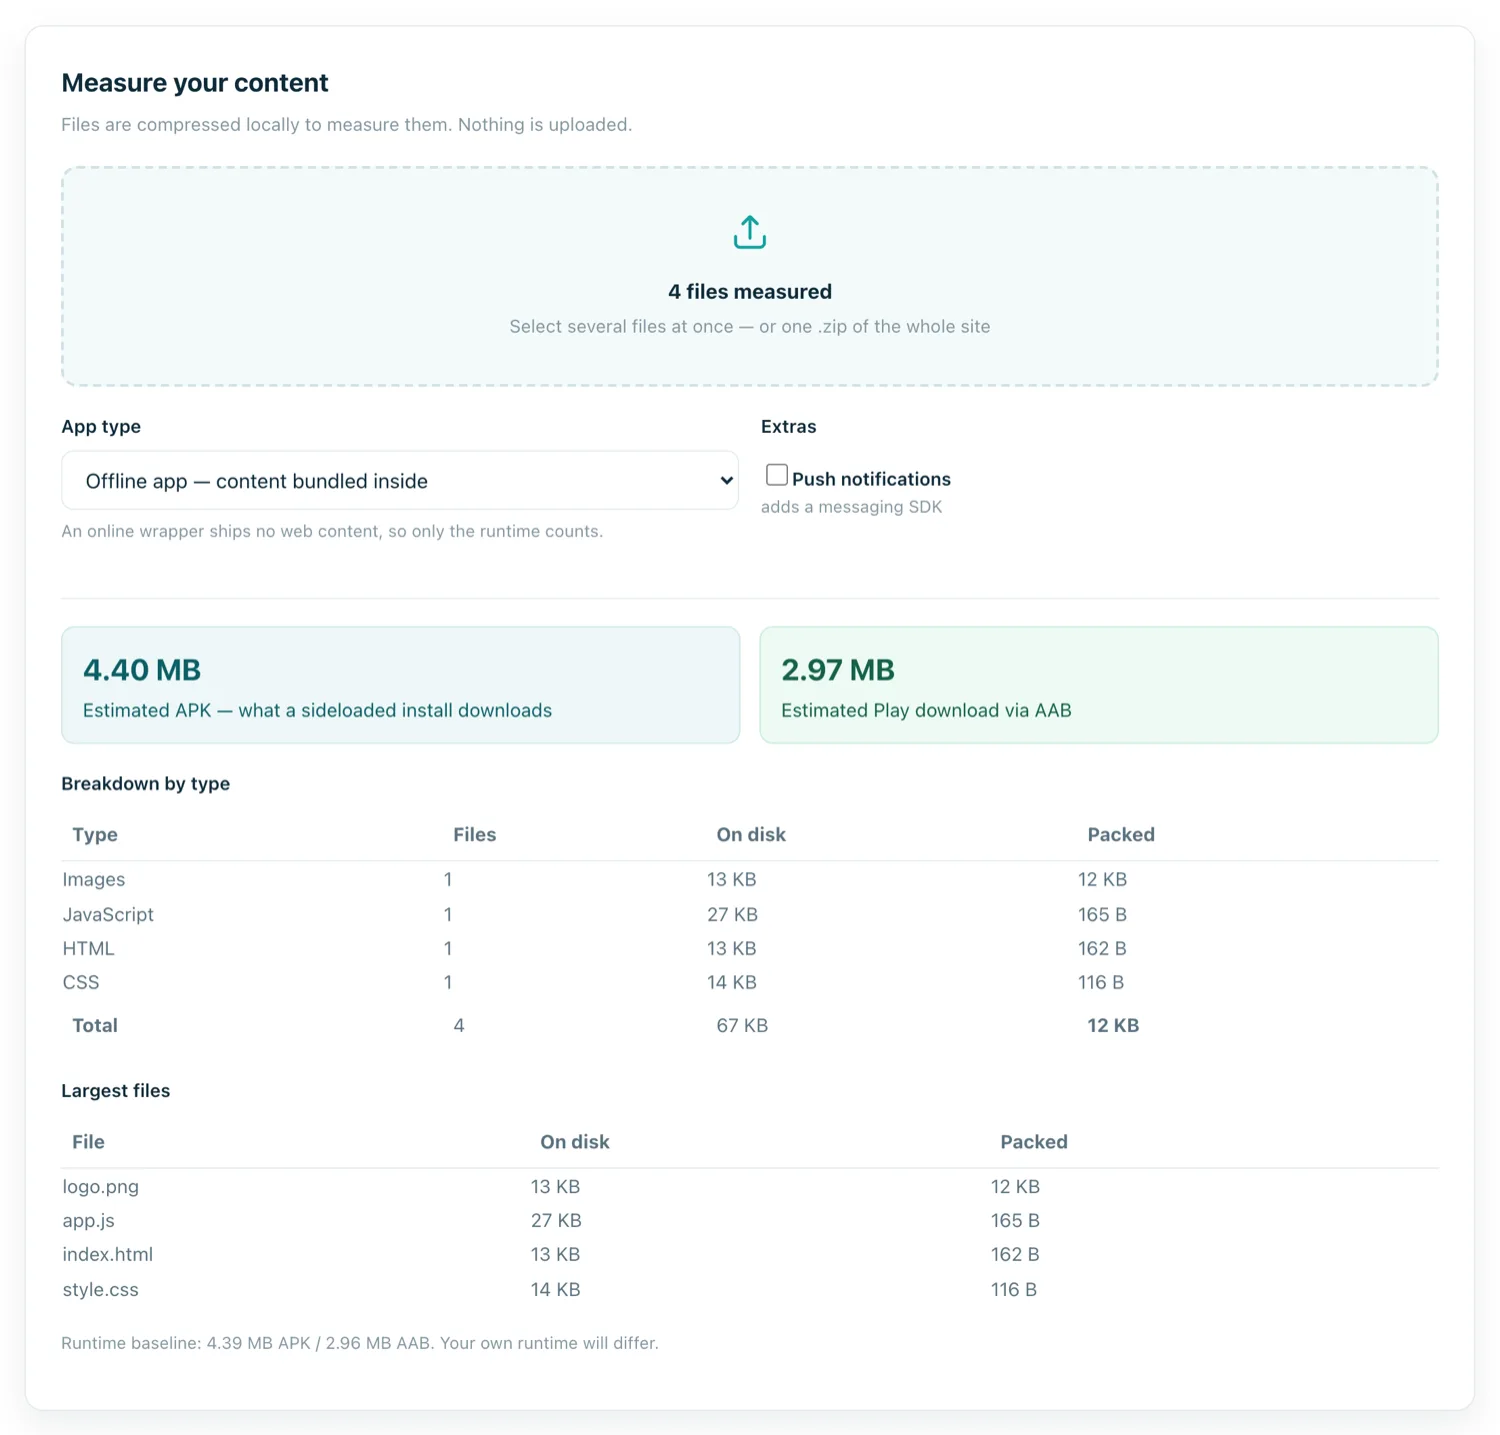
The Android runtime is roughly 4–5 MB before your content. Text compresses to about a quarter of its size inside the package, so a large HTML site often adds only a few hundred kilobytes. Images and video do not compress and dominate everything else.
What to do next
If the app works on your device, you have two directions. To share it directly — a client, a test group, a QR code on a poster — the APK is already what you need. To publish on Google Play, you need an App Bundle (AAB) instead, a developer account, and a store listing: see APK vs AAB and publishing to Google Play.